

Starting an online store might seem hard at first. However, with the right tools, anyone can do it. WordPress makes this journey smooth and stress-free. Moreover, millions of business owners trust this platform to sell their products online.
In today’s digital world, having an online store is not just nice to have. It is a must-have. People love shopping from their phones and computers. Therefore, businesses need to meet customers where they spend their time.
WordPress e-commerce offers a simple way to create your dream store. You do not need to know coding. You do not need a huge budget. All you need is a clear plan and the willingness to learn.
This guide will walk you through every step of building your online store. We will cover everything from setting up your website to adding products. Additionally, we will share tips to help you succeed in the long run.
Whether you sell handmade crafts, digital downloads, or physical goods, this guide is for you. By the end, you will have the knowledge to launch your store with confidence. So, let us get started on this exciting journey together.
Why Choose WordPress for Your Online Store?
WordPress powers over 40% of all websites on the internet. There are many good reasons for this popularity.
First, WordPress is free to use. You only pay for hosting and a domain name. This makes it perfect for new business owners with tight budgets.
Second, the platform is very flexible. You can change how your store looks without hiring a developer. Furthermore, thousands of free themes and plugins are available to help you.
Third, WordPress grows with your business. Whether you sell 10 products or 10,000, the platform can handle it. As a result, you will not need to switch platforms as your business expands.
Finally, WordPress has a huge community. If you run into problems, help is always available. Forums, videos, and guides make solving issues quick and easy.
Step 1: Get Your Domain Name and Hosting
Your domain name is your store’s address on the internet. It is what customers type to find you. Therefore, choose something simple and easy to remember.
Here are some tips for picking a good domain name:
- Keep it short and clear
- Make it easy to spell
- Include words related to your products if possible
- Avoid numbers and hyphens
After choosing your domain, you need web hosting. Hosting is like renting space on the internet for your store. Many companies offer WordPress-friendly hosting plans.
Look for hosting that offers:
- Fast loading speeds
- Good customer support
- Easy WordPress setup
- SSL security included
Popular hosting companies include Bluehost, SiteGround, and HostGator. Most of them offer one-click WordPress installation. This means you can have WordPress running in minutes.
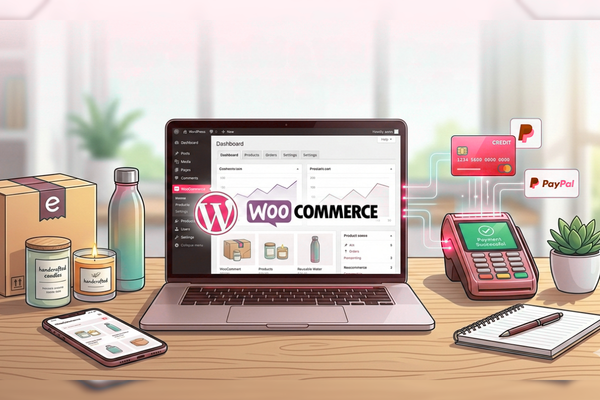
Step 2: Install WordPress and WooCommerce
Once your hosting is ready, install WordPress. Most hosting companies make this very simple. Just follow the steps on your dashboard.
After WordPress is installed, you need WooCommerce. This is a free plugin that turns your website into a full online store.
To install WooCommerce:
- Log in to your WordPress dashboard
- Go to Plugins and click Add New
- Search for WooCommerce
- Click Install and then Activate
WooCommerce will guide you through a setup wizard. This wizard helps you enter basic store information. You will add your address, currency, and payment details here.
The whole process takes about 15 to 20 minutes. Consequently, you will have a working store framework ready to customize.
Step 3: Pick a Theme That Fits Your Brand
Your theme controls how your store looks to visitors. First impressions matter a lot in online shopping. Therefore, choose a theme that looks professional and clean.
WordPress offers many free themes designed for online stores. However, premium themes often offer more features and better support.
When choosing a theme, consider:
- Does it load quickly?
- Does it look good on phones?
- Is it easy to customize?
- Does it match your brand style?
Popular WordPress e-commerce themes include Storefront, Astra, and OceanWP. These themes work well with WooCommerce and are beginner-friendly.
Step 4: Add Your Products
Now comes the fun part. Adding products brings your store to life.
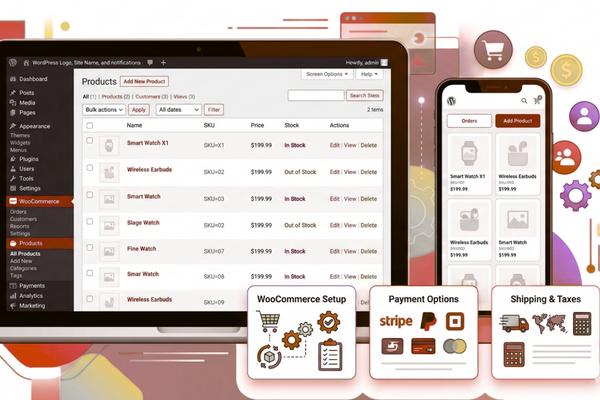
In your WordPress dashboard, go to Products and click Add New. Here, you will enter all the details about each item.
For each product, include:
- A clear and catchy title
- A detailed description
- High-quality photos
- The price and stock amount
- Product categories and tags
Good product descriptions help customers make buying decisions. Additionally, they help search engines find your store. Write descriptions that answer common questions buyers might have.
Take time to capture great product photos. Use good lighting and show items from different angles. In fact, photos often matter more than words when selling online.
Step 5: Set Up Payment and Shipping Options
Customers need a safe way to pay for their purchases. WooCommerce supports many payment methods right out of the box.
Common payment options include:
- Credit and debit cards
- PayPal
- Bank transfers
- Cash on delivery
Enable at least two payment options. This gives customers choices and can increase sales.
Next, set up your shipping options. Go to WooCommerce Settings and click the Shipping tab. Here, you can create shipping zones based on location. You can also set flat rates or offer free shipping.
Clear shipping information builds trust with customers. Therefore, display shipping costs early in the buying process.
Step 6: Test Everything Before Launching
Before opening your store to the public, test everything. Place test orders to make sure the checkout process works. Check that emails are sent correctly after purchases.
Look at your store on different devices. It should work well on computers, tablets, and phones. Additionally, try different web browsers to catch any display issues.
Ask friends or family to browse your store. Fresh eyes often spot problems you might miss. Their feedback can help improve the shopping experience.
Successful projects like Bundlbox show how proper testing leads to smooth launches. Learning from such projects can inspire your own success.
Step 7: Launch and Promote Your Store
After testing, you are ready to launch. Announce your store on social media and to your email list. Create excitement around your opening.
Consider these promotion ideas:
- Offer a launch discount
- Share behind-the-scenes content
- Partner with influencers in your niche
- Run social media contests
Search engine optimization helps customers find you. Use keywords related to your products in titles and descriptions. Furthermore, start a blog to share helpful content with your audience.
WordPress e-commerce stores benefit from regular updates. Add new products and fresh content to keep visitors coming back.

Conclusion
Building a WordPress e-commerce store is within your reach. You do not need advanced technical skills. Moreover, you do not need a big budget to get started.
Throughout this guide, we covered the essential steps. You learned how to choose hosting, install WordPress, and set up WooCommerce. Additionally, you discovered how to add products and set up payments.
The key to success is taking action. Start with the basics and improve over time. Your first version does not need to be perfect. In fact, many successful store owners started with simple setups and grew from there.
Remember that running an online store is a journey. You will learn new things along the way. Challenges will come, but solutions are always available. The WordPress community is full of helpful people ready to assist.
Focus on giving your customers a great experience. Answer their questions quickly. Ship orders on time. Ask for feedback and make improvements based on what you hear.
Online shopping continues to grow every year. People enjoy the convenience of buying from home. By starting your store now, you position yourself for future success.
Take the first step today. Register your domain name and choose your hosting. Install WordPress and WooCommerce. Before you know it, you will have a live store ready for customers.
The tools are waiting for you. The customers are out there searching. All that remains is your decision to begin. Your online business journey starts now, and we are confident you have what it takes to succeed.
FAQs
How much does it cost to start a WordPress online store?
Basic costs include hosting (around $3-10 per month) and a domain name (about $10-15 per year).
Do I need coding skills to build my store?
No. WordPress and WooCommerce are designed for beginners without technical knowledge.
Can I sell digital products with WooCommerce?
Yes. WooCommerce supports both physical and digital products easily.
How long does it take to set up a store?
A basic store can be ready in a few hours to a couple of days.
Is WordPress secure for online payments?
Yes. With proper security plugins and SSL certificates, WordPress stores are safe for transactions.