

Every modern web application serves more than one type of user. An admin needs full control, a manager needs insights, and a regular user only needs what matters to them. When everyone sees the same dashboard, confusion starts. Errors increase. Security risks grow. This is where role-based dashboards make a real difference.
A role-based dashboard shows the right information to the right user at the right time. It improves focus, reduces mistakes, and creates a smoother experience. More importantly, it builds trust. Users feel confident when they see only what they are allowed to access.
Today, many businesses struggle with dashboards that look good but fail in real use. Either they overload users with data or restrict them too much. Building dashboards that adapt to user roles is not just a design task. It is a technical decision that affects performance, safety, and future growth.
In this blog, we explain how to build Role-Based Dashboards in modern web applications using a simple and practical approach. We will break down the process into clear steps, avoid complex terms, and explain each idea in plain language. We will also share insights from a real-world project where this approach helped create better control, better clarity, and better results.
What Is Role-Based Dashboards?
A role-based dashboard is a dashboard that changes based on who is logged in. Instead of one fixed layout, the system shows different data, tools, and actions for each role.
For example:
- An admin can manage users and view system reports
- A manager can track progress and performance
- A user can view personal data and tasks
Each role has its own view, even though all users use the same application. This structure keeps things organized and secure.
Using Role-Based Dashboards also makes applications easier to use. Users do not waste time searching for features they cannot access. Everything feels clean and focused.
Why Role-Based Dashboards Matter in Modern Applications
First of all, role-based dashboards improve security. When users only see what they need, the risk of data leaks drops.
Secondly, they improve performance. The system loads only relevant data instead of everything at once.
Most importantly, they improve user experience. People feel comfortable when an application feels made for them.
From a business point of view, this approach reduces support issues and training time. Users understand the system faster because it matches their role and purpose.
Step 1: Define User Roles Clearly
Before writing any code, define your roles clearly. This step is often skipped, but it is critical.
Ask simple questions:
- Who will use the system?
- What actions does each user need?
- What data should each role see?
Avoid creating too many roles at the start. Keep it simple. You can always add more later.
Clear role definitions help developers build clean logic and help designers create better layouts.
Step 2: Set Permissions at the Backend Level
Once roles are defined, permissions must be handled on the server side. This ensures safety.
Each request to the server should check:
- Who is the user?
- What role do they have?
- Are they allowed to access this data?
This step prevents users from accessing restricted areas even if they try to bypass the interface.
In one real project we worked on, the team built strict role checks at the API level. This ensured that dashboards stayed safe even as the platform scaled. You can see a similar approach used in Dropship Academy project
Step 3: Design Dashboards Based on User Needs
Design should follow function. Each dashboard layout should reflect what the user needs daily.
For example:
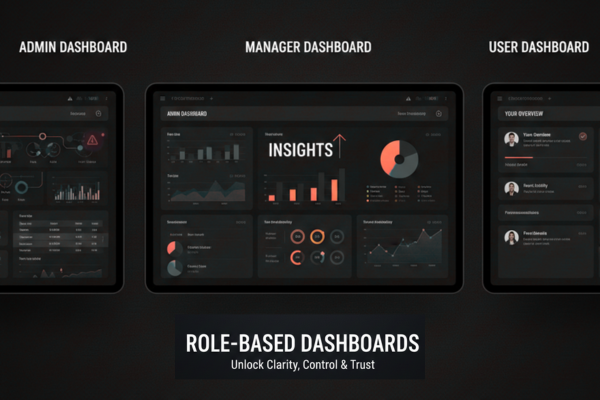
- Admin dashboards focus on control and overview
- Manager dashboards focus on tracking and insights
- User dashboards focus on actions and progress
Avoid clutter. Use clear labels. Keep numbers meaningful.
A good dashboard answers questions quickly. If users need to think too much, the design has failed.
This user-first approach played a key role in how dashboards were shaped in one of our recent projects, where clarity and control were top priorities.
Step 4: Connect Roles with Frontend Logic
Now comes the front-end work. Once a user logs in, the application should:
- Identify the user role
- Load the correct dashboard layout
- Show only allowed components
This logic keeps the interface clean and fast.
Using conditional rendering helps load only what is needed. As a result, the app feels smoother and more responsive.
At this stage, Role-Based Dashboards truly come to life because design and logic work together.
Step 5: Handle Data Loading Carefully
Different roles need different data. Loading everything at once is a common mistake.
Instead:
- Load admin data only for admins
- Load user data only for users
- Avoid extra requests
This approach reduces server load and improves speed.
It also protects sensitive data by ensuring it never reaches the wrong user.
Step 6: Test Each Role Separately
Testing is often done with one user type. That is risky.
Each role should be tested separately to ensure:
- Correct access
- Correct data
- Correct actions
Small mistakes in role logic can lead to serious issues later.
Testing also helps improve user flow and catch confusing layouts early.
Common Mistakes to Avoid
Even strong teams make these mistakes:
- Mixing role logic in many places
- Relying only on frontend checks
- Overloading dashboards with features
- Ignoring future role expansion
Avoid these issues by keeping role logic centralized and simple.
How Real Projects Benefit from Role-Based Dashboards
In a recent web platform project, the team built separate dashboards for admins and coaches. Each dashboard focused on what mattered most to that role.
Admins gained control over users and payments. Coaches gained insight into performance and schedules. As a result, the platform became easier to manage and easier to use.
This real-world example shows how Role-Based Dashboards are not just a technical choice. They are a business advantage.
Conclusion
Building role-based dashboards is no longer optional in modern web applications. It is a smart and necessary step toward better security, better performance, and better user experience.
When users see only what matters to them, they work faster and make fewer mistakes. When systems control access properly, businesses stay safe and organized. These benefits grow as the platform scales.
The key is to start with clarity. Clear roles lead to clean logic. Clean logic leads to smooth dashboards. Smooth dashboards lead to satisfied users.
A successful approach always combines backend safety with frontend simplicity. Neither should work alone. Together, they create dashboards that feel natural and reliable.
Real-world projects show that this approach works best when teams think beyond visuals. Dashboards should support daily work, not distract from it. They should guide users, not confuse them.
If you are building a modern web application, planning for Role-Based Dashboards early will save time, cost, and effort later. It will also make your product easier to grow and easier to trust.
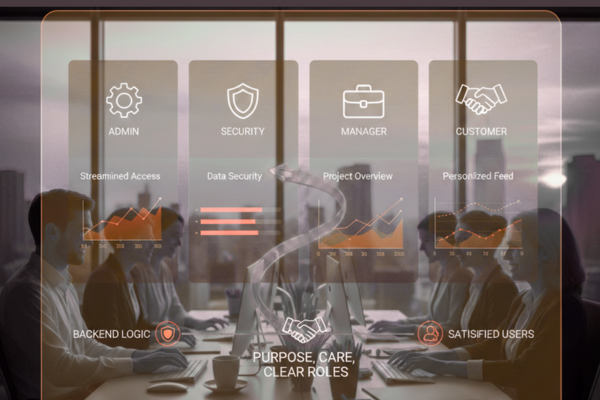
Strong dashboards reflect strong systems. And strong systems are built with purpose, care, and clear roles at their core.
FAQs
What is a role-based dashboard?
A dashboard that changes based on the user’s role.
Why are role-based dashboards important?
They improve security, clarity, and user experience.
Can role-based dashboards scale easily?
Yes, when roles and permissions are planned early.
Do all apps need role-based dashboards?
Any app with multiple user types benefits from them.