

In today’s digital market, people expect fast, smooth, and clear online shopping from the first click to the final checkout. Brands cannot afford broken links, slow pages, or confusing layouts. This is why a clear and reliable Shopify build workflow matters so much.
Many teams still treat design, development, and launch as separate steps. As a result, projects take longer, details get lost, and the final site feels different from the original design. By using a simple, step‑by‑step workflow, you can move from Figma design to Shopify deployment in a clean and safe way, without losing quality or speed.
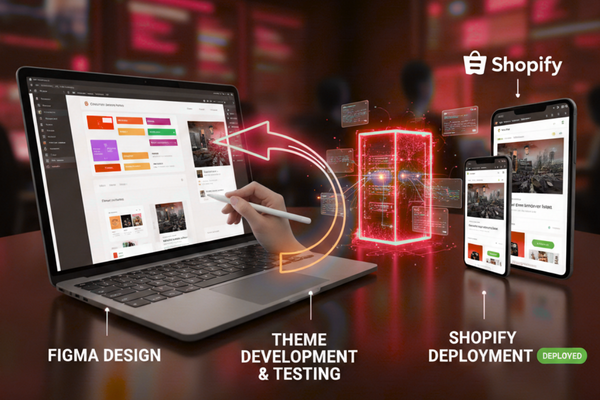
In this blog, we will walk through a full Shopify build process used by our development team. We will move from planning and design in Figma, to theme development, testing, and deployment on Shopify.
1. Setting the Foundation: Goals, Scope, and Platform Setup
Before opening Figma or writing a single line of code, it is important to define what you are building and why.
1.1 Clarify business and user goals
Start by answering a few simple questions:
- What products will you sell?
- Who is your main customer?
- What action do you want visitors to take first?
- What makes your offer different?
Write short, clear statements for each answer. These will guide your Shopify build workflow and help you avoid extra features that add time but not value.
1.2 Define scope and must‑have features
Next, list your must‑have features for launch, such as:
- Product catalog with filters
- Clear product pages
- Simple cart and checkout flow
- Mobile‑friendly layout
- Basic analytics and tracking
Then list “nice‑to‑have” items you can add later, like advanced filters, loyalty tools, or custom landing pages. This split helps keep the first launch clean and on time.
1.3 Prepare the Shopify environment
Before design and build, set up:
- A Shopify account and development store
- Basic store settings (currency, tax, shipping rules)
- Any needed apps you know you will use
Having a ready test store saves time later and gives designers and developers a real place to preview their work.
2. Designing in Figma: From Wireframes to Final UI
Figma is the main tool for visual planning in this Shopify build workflow. It helps teams see the store before any code is written.
2.1 Wireframes: Structure before style
Start with low‑detail wireframes:
- Plan key pages: home, collection, product, cart, checkout
- Map the layout: header, menu, content areas, footer
- Sketch the flow: how users move from browsing to buying
Wireframes keep the team focused on logic and ease of use, not colors and fonts.
2.2 High‑fidelity designs: Brand and detail
Once the structure feels right, move to full designs:
- Apply brand colors, fonts, and imagery
- Use real product names and sample content
- Show states for buttons, hover views, and error messages
Make sure product details like price, size, and options are all visible and clear. This is the “real” version of your store that everyone can review.
2.3 Design system and components
To avoid repeating work and to support a smooth build, create simple Figma components:
- Buttons and links
- Headings and text styles
- Cards for products and content
- Reusable sections like banners and feature blocks
This makes it easier for developers to turn the design system into reusable code inside the Shopify theme.
3. Hand‑Off: Turning Figma Designs into Developer Tasks
After the design is approved, do not jump straight into free‑form coding. Instead, follow a clear hand‑off process to keep the Shopify build workflow smooth.
3.1 Organize design files
Make sure your Figma file is clean:
- Name layers clearly
- Group sections by page
- Use consistent spacing and grid systems
This makes it easier for developers to match sizes, spacing, and layout.
3.2 Document behavior and edge cases
Use simple notes or comments in Figma to explain:
- What happens when a user clicks a button
- How menus and filters open and close
- How images should behave on mobile vs desktop
This reduces guesswork and prevents mismatches between design and final build.
3.3 Create a task list
Break the project into clear development tasks:
- Set up base theme structure
- Build header and footer
- Build home page sections
- Build product and collection templates
- Connect content from the Shopify admin
Small, well‑named tasks make it easier to track progress and test each part.
4. Building the Shopify Theme: Step by Step
With designs ready and tasks in place, development can start in an organized way.
4.1 Choose the starting point
Decide whether to:
- Start from a trusted base theme and customize it, or
- Build a fully custom theme from scratch
For many projects, a clean, flexible base theme speeds up the Shopify build workflow while still allowing deep changes.
4.2 Set up the development environment
Use standard tools and setups:
- Connect your theme to a Git repository for version control
- Use a local theme development tool or Shopify CLI
- Create separate branches for new features and fixes
This helps you track changes and safely test new ideas.
4.3 Build global layout: header, footer, basic templates
Start with the pieces that appear on every page:
- Header with logo, navigation, search, and cart icon
- Footer with links, contact, and basic information
- Base templates for standard pages
Once these are in place, you can move on to more detailed sections.
4.4 Build home, collection, and product pages
Based on your Figma designs:
- Build sections for hero banners, featured products, and categories
- Create clean collection templates with filters and sorting
- Build product pages with clear options, images, and “add to cart” logic
Keep content areas flexible so non‑technical staff can change text and images from the Shopify admin.
4.5 Optimize for mobile from day one
Do not wait until the end to test mobile. Check each section as you go:
- Make sure text is readable on small screens
- Ensure buttons are easy to tap
- Avoid long pages with no clear action
Since many users shop on their phones, mobile is not an extra—it is core.
5. Testing and Quality Checks
Before deployment, proper testing is key. Even a strong design and build can fail if basic checks are skipped.
5.1 Functional testing
Check that:
- All links and buttons work as expected
- The cart and checkout flow run smoothly
- Forms send correct data and show clear errors if needed
Test in different browsers and on both desktop and mobile devices.
5.2 Content and visual checks
Confirm that:
- Text is free from spelling mistakes
- Images are clear and correctly sized
- Layout matches the approved Figma design
Walk through the site like a real customer and see if anything feels confusing or missing.
5.3 Speed and basic SEO
Improve loading speed by:
- Compressing images
- Avoiding heavy scripts and unused apps
- Using lazy loading where suitable
For basic SEO:
- Use clear page titles and meta descriptions
- Add alt text on images
- Keep URLs clean and readable
6. Deployment and Post‑Launch Improvements
The final step in the Shopify build workflow is going live, but the work does not end there.
6.1 Safe deployment
To launch safely:
- Use a final staging theme for last checks
- Schedule the switch during a low‑traffic time
- Keep a backup of the previous theme in case you need to roll back
After deployment, do a quick live test of key flows like browsing, adding to cart, and checkout.
6.2 Monitor and refine
After launch, watch how users behave:
- Use analytics to track traffic and conversions
- Note where users drop off in the funnel
- Gather feedback from customers and support teams
Then plan small, focused updates to improve weak spots. This mindset keeps the store growing, not just “done.”
6.3 Real‑world example
To see how this process looks in a real project, you can refer to this case study:
Shopify project case study using this full workflow.
It shows how a full design‑to‑deploy process can support a clean, fast, and user‑focused online store.

Conclusion: Why a Clear Shopify Build Workflow Matters

A strong online store is not an accident. It is the result of a careful process that respects both design and development, and keeps the end user in mind at every step. Moving from Figma to Shopify deployment is not just about tools; it is about how your team thinks and works together.
First, by setting clear goals and scope, you avoid confusion and feature overload. You know what matters for launch and what can wait. Then, by using Figma in a smart way—starting with wireframes, then moving to full designs and a simple design system—you create a visual source of truth that everyone can trust.
Next, a clean hand‑off and well‑planned development steps help turn that design into a real theme without losing details. Developers can build in a structured order, from global layout to key pages, while always keeping mobile and speed in mind. This keeps the experience smooth and stable for users.
Testing and careful deployment then provide a safe bridge from build to live site. Instead of a risky “big switch,” you move through clear checks and backup plans. Finally, by watching real user data and feedback after launch, you keep improving the store instead of letting it age.
In simple terms, a good Shopify build workflow gives you more than a working site. It gives you a repeatable way to go from idea to launch with less stress, fewer delays, and a better result for both your team and your customers. When you follow this kind of step‑by‑step process, you are not just building a store once; you are building a model you can use again and again for future projects, brands, and markets.
FAQs
- How long does a full Shopify build usually take?
Most full builds take 6–10 weeks, depending on scope and content. - Do I need custom code for every Shopify project?
No. Many projects start from a base theme and add custom parts where needed. - Can I change designs after launch?
Yes. With a flexible theme, you can update sections, content, and layouts over time. - Is Figma required to design for Shopify?
No, but it is widely used and makes teamwork and hand‑off much easier. - When should I focus on SEO in a Shopify project?
From the start, plan structure, URLs, and content with search in mind.